Assignment 3: The Catmull-ROM COM
In which, we build a curve editor for Catmull-Rom and Hermite splines
Due Friday, Oct 1, before midnight
The goals of this lab are to
-
Implement Catmull-Rom splines
-
Implement Hermite splines
-
Implement an interactive spline editor
Implementation overview
For this assignment you will implement several splines along with an interactive spline editor.
You have been given basecode as a starting point for this assignment. It consists of a Spline class (see spline.h)
which is capable of using different Interpolator objects (see interpolator.h, interpolator_catmuullrom.h, etc.) to interpolate between points. Interpolators store the control points for each segment in the spline and can interpolate
between segments given a segment ID and value u in the range 0 to 1.
You will implement different interpolators for this assignment. Each must override the following two functions:
-
Interpolator::computeControlPoints(const std::vector<glm:::vec3>& keys). This function should replace the current control points, stored inmCtrlPoints, with new values based on the given keys. Note that the vector of keys might only have 0 or 1 keys in it. If this is the case, the list of control points should be empty because there are no segments yet to interpolate! -
InterpolatorLinear::interpolate(int segment, float u). This function should return an interpolated value on the given segment. The valueushould range between 0 and 1.
Get the source
On Github, do a Fetch Upstream to synchronize your forked repository with the class repository.
Then update the source on your local machine and rebuild.
> git pull
> cd build
> cmake ..; make
1. Linear splines
In the file interpolator_linear.h, implement an interpolator that computes linear interpolation.
-
Implement
InterpolatorLinear::computeControlPoints -
Implement
InterpolatorLinear::interpolate
| We recommend you store your control points so as not to repeat points at adjoining segments, like so \(p_0 p_1 p_2 \cdots p_n\) |
To test your implementation, run the utility test_linear.cpp.
~/cs317/AnimationToolkit/build$ ../bin/a3-test-linear
control points: vec3(0.000000, 0.000000, 0.000000)
control points: vec3(1.000000, 1.000000, 0.000000)
control points: vec3(2.000000, 0.000000, 0.000000)
interpolate(0, 0) = vec3(0.000000, 0.000000, 0.000000)
interpolate(1, 1) = vec3(2.000000, 0.000000, 0.000000)
interpolate(1, 0.5) = vec3(1.500000, 0.500000, 0.000000)
2. Catmull-ROM splines
In the file interpolator_catmullrom.h, implement a Catmull-ROM interpolator using the formulation from class.
-
Implement
InterpolatorCatmullRom::computeControlPoints -
Implement
InterpolatorCatmullRom::interpolate
To test your implementation, run the utility test_catmullrom.cpp.
Notice that this utility implements the spline from lab!
| We recommend you store your control points so as not to repeat points at adjoining segments, like so \(b_0^0 b_1^0 b_2^0 \quad b_0^1 b_1^1 b_2^1 \cdots b_0^n b_1^n b_2^n b_3^n\) |
To run your program from the build directory, type
~/cs317/AnimationToolkit/build$ ../bin/a3-test-catmullrom
control points: vec3(0.000000, 0.000000, 0.000000)
control points: vec3(0.166660, 0.166660, 0.000000)
control points: vec3(0.666800, 1.000000, 0.000000)
control points: vec3(1.000000, 1.000000, 0.000000)
control points: vec3(1.333200, 1.000000, 0.000000)
control points: vec3(1.833340, 0.166660, 0.000000)
control points: vec3(2.000000, 0.000000, 0.000000)
interpolate(0, 0) = vec3(0.000000, 0.000000, 0.000000)
interpolate(1, 1) = vec3(2.000000, 0.000000, 0.000000)
interpolate(1, 0.5) = vec3(1.562452, 0.562497, 0.000000)
3. Hermite spline
In the file interpolator_hermite.h, implement a Hermite interpolator using the formulation from class.
-
Implement
InterpolatorHermite::computeControlPoints -
Implement
InterpolatorHermite::interpolate
To test your implementation, run the utility test_hermite.cpp.
Notice that this utility implements the spline from lab!
| We recommend you store your control points so as not to repeat points at adjoining segments, like so \(p_0 p'_0 \quad p_1 p'_1 \cdots p_n p'_n\) |
To run your program from the build directory, type
~/cs317/AnimationToolkit/build$ ../bin/a3-test-hermite
control point: vec3(0.000000, 0.000000, 0.000000)
control point: vec3(1.000000, 0.000000, 0.000000)
control point: vec3(1.000000, 2.000000, 0.000000)
control point: vec3(1.321429, 2.035714, 0.000000)
control point: vec3(3.000000, 3.000000, 0.000000)
control point: vec3(2.714286, 0.857143, 0.000000)
control point: vec3(6.000000, 3.000000, 0.000000)
control point: vec3(2.821429, -2.464286, 0.000000)
control point: vec3(8.000000, 0.000000, 0.000000)
control point: vec3(1.000000, 0.000000, 0.000000)
(clamped) interpolate(0, 0) = vec3(0.000000, 0.000000, 0.000000)
(clamped) interpolate(3, 1) = vec3(8.000000, 0.000000, 0.000000)
(clamped) interpolate(2, 0.5) = vec3(4.486607, 3.415179, 0.000000)
(natural) interpolate(0, 0) = vec3(0.082321, 0.224750, 0.000000)
(natural) interpolate(3, 1) = vec3(7.831821, 0.374250, 0.000000)
(natural) interpolate(2, 0.5) = vec3(4.513393, 3.281250, 0.000000)
Above, we list the control points for a Hermite spline with clamped endpoints. If we use natural endpoints, we would get
control point: vec3(0.000000, 0.000000, 0.000000)
control point: vec3(0.821429, 2.250000, 0.000000)
control point: vec3(1.000000, 2.000000, 0.000000)
control point: vec3(1.357143, 1.500000, 0.000000)
control point: vec3(3.000000, 3.000000, 0.000000)
control point: vec3(2.750000, 0.750000, 0.000000)
control point: vec3(6.000000, 3.000000, 0.000000)
control point: vec3(2.642857, -1.500000, 0.000000)
control point: vec3(8.000000, 0.000000, 0.000000)
control point: vec3(1.678571, -3.750000, 0.000000)
4. Spline
The Spline class manages keyframes provided by the user and supports multiple interpolation types. You implemented the different interpolation methods in the previous sections. Now let’s complete the spline class.
Read spline.h and spline.cpp.
Finish the implementation of the following method in spline.cpp:
-
Spline::getValue(float t)Givent, this method must determine the segment and normalized time and then use the current interpolator to return a value. If t is less than the first time, clamp to the first value. If t is greater than the last key time, clamp to the last value.
Test your implementation using the utility test_spline.cpp. To run from the build directory, type
> ../bin/a3-test-spline
-------------------------------
Current interpolation type: Linear
Number of control points: 0
Duration: 0
getValue(0): vec3(0.000000, 0.000000, 0.000000)
-------------------------------
Current interpolation type: Linear
Number of control points: 2
Duration: 1
getValue(-1): vec3(0.000000, 0.000000, 0.000000)
getValue(5): vec3(1.000000, 1.000000, 0.000000)
getValue(0.5): vec3(0.500000, 0.500000, 0.000000)
getValue(0): vec3(0.000000, 0.000000, 0.000000)
getValue(1): vec3(1.000000, 1.000000, 0.000000)
-------------------------------
Current interpolation type: Linear
Number of control points: 3
Duration: 2
getValue(1.5): vec3(1.500000, 0.500000, 0.000000)
-------------------------------
Current interpolation type: Catmull-Rom
Number of control points: 7
Duration: 2
getValue(1.5): vec3(1.562452, 0.562497, 0.000000)
-------------------------------
Current interpolation type: Hermite
Number of control points: 6
Duration: 2
getValue(1.5): (clamped) vec3(1.500000, 0.500000, 0.000000)
getValue(1.5): (natural) vec3(1.500000, 0.687500, 0.000000)
-------------------------------
Current interpolation type: Hermite
Number of control points: 6
Duration: 2
getValue(1.5): (natural)vec3(1.906250, 1.093750, 0.000000)
-------------------------------
Current interpolation type: Hermite
Number of control points: 4
Duration: 2
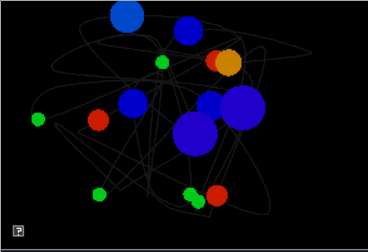
getValue(1.5): vec3(2.250000, 0.750000, 0.000000)5. Curve editor
In the file a3-splines/curve_editor.cpp, complete the implementation of the curve editor.
The basecode includes a simple UI based on keyboard controls.
-
Blue points represent the input data (aka keys) which are interpolated between.
-
Yellow points represent additional control points
Keyboard Controls:
-
1: Linear
-
2: Catmull-Rom
-
3: Hermite
-
c: Toggle control points
-
h: clamp hermite on/off
-
a: add mode
-
e: edit mode
-
d: delete mode
-
SPACEBAR: clear
Finish the implementation of the curve editor.
-
Implement
CurveEditor::scene()so it draws each spline. When control points are visible, display the control points differently for catmull-rom and hermite splines to indicate how their control points differ.
To run from the build directory, type
build> ../bin/a3-curve-editor6. Be Unique!
Implement your own unique animation or image in a3-splines/unique.cpp. Below are some ideas:
-
Implement a unique interpolator
-
Animate a character that has splines for limbs
-
Use splines to animate shapes or create interesting patterns
-
Support drawing splines in different colors.
-
Draw something using splines
7. Hand-in your work
7.1. What to hand-in
-
Your code
-
Images, movies, gifs, as appropriate
-
Your readme
7.2. How to hand-in
Check-in your code, images, and writeup and push the changes to Github. If everything is uploaded correctly, you will see your work on Github.
> cd animation-toolkit
> git add <files>
> git commit -m "helpful message"
> git push
Best practice is to always commit changes as you work, rather than waiting until the end to commit changes. You can always revert to an old version if you need to!
Your code should download and compile without modifications. Test your assignment on a lab machine (Park 230) to ensure that it works.
7.3. Generating images, movies and gifs
Screenshots
On Ubuntu, you can take a screenshot by
-
Prt Scrn to take a screenshot of the desktop.
-
Alt + Prt Scrn to take a screenshot of a window.
Gifs
On Ubuntu, you can use Peek to create gifs.
Movies
On Ubuntu, you can use recordmydesktop to record movies in .ogv format.
By default, the whole desktop is recorded unless you give it a window id.
To get the window id, call xwininfo and click on the window. Then pass the
id to recordmydesktop.
> recordmydesktop --windowid <WindowId> --no-sound --v_quality 30 -o <name>.ogvTo check the video, open it in firefox.
> firefox <name>.ogv| Files larger than 100 MB cannot be checked into git. In general, videos should be less than 5 MB. |
7.4. Update your Readme.md
Update assignments/a3-splines/Readme.md to document the features in your assignment. Your readme should contain your images, gifs, and movies.
On github, you can drag and drop movies into your readme files. Images and gifs can also be added that way, or by including text such as the following
This Guide can help you with writing markdown.